Thursday, November 29, 2012

Resources for Young Makers


A friend of mine recently asked my advice. Apparently his twelve year old nephew is turning out to be "quite the geek". As my friend described his nephew's love to take stuff apart and make something new with it, I could tell we had the beginnings of a fine young maker.

The challenge is that the boy's parents are not necessarily so technical. They know that he built something out of an Xbox and laptop, but they cannot begin to explain what it is. They've tried to support him by getting him some kits from Radio Shack, but he wasn't really challenged by them.

My friend turned to me for some suggestions for challenging kits that would not "do any damage to the house". So here is my list of...

Resources for Young Makers


#1: Let's Make Robots

Being a robotics enthusiast myself, I had to lead with the Let's Make Robots website. If you think your own young maker would like robots, this is a great place to start. Joining Let's Make Robots is free and they do have some younger members. There are lots of supportive people and example projects on the site, such as the Start Here robot project, pictured below.


#2: MAKE Magazine

MAKE is another good resource. They have subscription print and online versions, as well as free projects posted on the Make Projects website. They also sell kits and parts at the Maker Shed. Projects and articles are organized by topic; there's something for everyone.


#3: Instructables


Another great website is Instructables. This is a free site with loads of projects. Just about anything you can imagine, all submitted by members.

Since the content is member-submitted, the quality does vary a bit. There are many very good step-by-step projects, listing parts and materials needed. 

Instructables even runs contests to encourage makers to share their knowledge.


Projects are organized into various topics, and the whole site is a searchable wealth of collected practical knowledge.


#4: Adafruit


Another wonderful company is Adafruit. They are an open source hardware electronics company, with a strong social network. Adafruit was started by Limor Fried (aka Ladyada), pictured on the cover of Wired Magazine to the left.

Limor started the company to create a "place online for learning electronics and making the best designed products for makers of all ages and skill levels." That's an admirable goal, and they are a driving force in today's maker movement.

Adafruit specifically created some skill badges for young people at the Adafruit Academy. The badges are like Scouting badges, except on subjects like soldering, using a multimeter, programming, and much more. 


There is also the Lady Ada website, which includes projects and resources to help you make stuff.

#5: DIY.org

Another site is diy.org. Kids can join (with parents' assistance) and do projects and challenges to earn skill badges.

Unlike Instructables, MAKE, or Adafruit, the whole site is designed around kids.

They even created a video "Anthem", encouraging kids not only to build, make, hack and grow, but also to share what they learned with others on the site.


There are plenty of other resources out there, far too many to list. However, I would recommend that young makers pick just one or two places to start with. Finding a good resource and a supporting maker community is the best way to start. Hopefully, something in the list above to appeal to the maker in your family.

Wednesday, November 28, 2012

Aerial DroneGift Guide


I was recently asked to write a gift guide on aerial drones. Though the topic was pretty new to me, I decided to jump in and accept the offer. I read countless product reviews and descriptions, visited online shops, and asked questions of those more experienced than myself.

The result is the MAKE 2012 Gift Guide: Aerial Drones. I think it came out pretty well, and I hope it will be helpful to holiday shoppers. I plan to continue learning more as I gain experience in this fun hobby.

Wednesday, October 3, 2012

The Undying Desire to Make

This past weekend, I had the wonderful experience of running four robot making workshops at Maker Faire NY. I've organized the Let's Make Robots presence at Maker Faire for the past two years. Last year, I was able to sit down with a small handful of kids and make a very simple robot. This year, I wanted to do a lot more. Thanks to the sponsorship of PICAXE, I did.

PICAXE makes a Microchip PIC microcontroller with their own bootloader, as well as project boards and other products. The boards are easily to program with a BASIC style language, making them a great choice for beginners. They sponsored us, providing enough funds and their PICAXE-08 Motor Driver Boards for 100 attendees to build and take home their own fully programmable robot. Cost to the attendees: FREE.

There was so much demand, we had to turn people away. Everyone was excited to try to make their own robot. My feeling is that anyone can make a robot, and in fact everyone should make a robot. It's a great experience, involving mechanical, electrical, and programming skills. 

It was great to see so many young makers come out. It all starts with them.

These kids did a great job. They sat and listened for a full hour. They concentrated. They followed instructions. They asked good questions. Quite a few also skipped ahead of the instructions I was giving. They figured it out for themselves. Sometimes they made mistakes. All to the good. They learned.

But it's not just about the kids. Four years ago, despite a strong technical background and education, I was not working with electronics or robotics at all. It wasn't until my son was a few years old, that I was struck with the desire to make things again. I re-tapped into something from my youth. It was a desire to build, to discover and learn. I had that when I was a kid, and I wanted to give my own children the opportunity to make. 

We had young adults, parents, educators, and even one senior citizen participate. To some this was new, or like me, they were re-discovering something they hadn't done in a long while.

This was a hands on workshop. Here you can see a young lady attaching the wheels of her robot. 

One mother said to me, "I've never done anything like this. Is my son doing this right?" He sure was. I was glad to see a parent willing to sit with her kid through the workshop, even though it wasn't her own interest. 

A middle-aged man attended with an older gent  in a powered wheelchair, that I assume was his father. After the workshop, I sat with the older man for a while. He was so happy to work on a project that used his hands and his mind. We actually had a very nice conversation comparing the robot we built to his powered wheelchair.

One couple sat down to work with their own two kids. They even lent a hand to some other kids when they had questions. Most of the grown ups were more than happy to lend a hand if their neighbor was stuck on something. It was that kind of crowd. It was great to see.

I heard a lot of positive feedback after the workshop. Parents thanked me for giving their kids this opportunity. Everyone went away happy. 

This kid right here? The one on the left with the smile? This is my favorite moment from Maker Faire. 

That's pride. He made his very first robot. He did it himself with almost no help. 

He's just discovered something wonderful about himself. He can make. My fondest hope for him is that  he never loses that. I hope he takes that feeling into the world and does amazing things with it.

Those kids, boys and girls, those adults from teens to seniors, those people made this event my favorite way to spend my weekend. I can't wait until next year!

Tuesday, July 31, 2012

User Serviceable Parts Inside


Don't open that! Here there be monsters!

Why do some hackers and hobbyists get their panties in a twist over the phrase, 'no user serviceable parts inside'? What's the big deal?

For many that tinker a lot (like me), there's a mindset about fixing something instead of replacing it when it breaks. Just the thought of tossing out a perfectly good piece of consumer electronics for a minor problem annoys me. People used to fix their appliances all the time, or have them fixed at a local repair shop. This is less and less of an option in our modern world. The costs for electronics is so low, it is often easier to buy new rather than repair. Few repair shops even exist, though there are some options if you really want.

We are discouraged from trying to repair our own electronics. "Your warranty may be voided." "It will be $170 to repair, or for just $40 more, you can buy an upgraded model."

A recent example

I just went through the experience of repairing a car stereo. The display back light was not working; since the only clock in the car is on the stereo, this was especially annoying. Also, the CD player had an appetite for chewing up CDs. 

To be honest, I first tried to replace the radio. I searched for an inexpensive option on craigslist, and found a likely candidate for just $15. Well, at least I would be re-using, rather than buying new. However, when I got the new-to-me stereo home, I found the tuner didn't work. However, it turned out this stereo was the same brand as my own (Sony), and the insides were pretty similar. In fact, the CD player module had the same model number internally. I figured I'd get some value back on my $15 and swapped the CD player out. 

As long as I had the stereo partially disassembled, I decided to try to fix the back light. I figured it would be a simple LED or two. As it turned out, it actually used two little neon lamps. I was able to track down a place to order them. It more than I wanted to spend; the shipping alone was more than the cost of the part. Nevertheless, I decided to go for it.

Don't be afraid, there are no monsters in there.
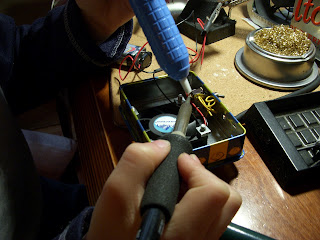
When the part arrived a week later, I opened up the stereo again. Each time I had to open it, there were many screws, clips and things to remove. I got to be pretty familiar with getting to the guts of this device. Finally ready, I set up my soldering station, and opened the bag with my new neon lamps. 

What I found was that my "new" parts were in pretty bad shape. The leads of the little lamp appeared a bit rusty. As I held the tiny green lamp, it actually fell apart in my hands. The glass bulb underneath the green cover was cracked. It was dead on arrival. 

So... I contacted the supply house I had bought the lamp from. After some discussion, they agreed to refund my money, and placed a new order for me. Another week of waiting. Another chance to practice putting the stereo back together.

When the new lamp arrived, guess what? It was exactly like the last one. Leads rusted and glass broken. I'll be contacting the seller shortly for a refund. However, I was able to repair my back light after all.

I poked around with my multimeter and figured out how the lamps were powered. The two lamps were wired in series, so if either lamp burnt out, the light would not work. I replaced them with two LEDs and a current limiting resistor. 

In fact, as long as I was repairing and re-engineering, I figured I might as well customize. A red back light would look much cooler with the rest of the things in my car's dashboard. So I installed two tiny bright red LEDs in place of the green neon lamps.

So what's the point of all this?

What did I gain from all of this? I spent some money and lots of time. What do I have to show for it? Was it worth it?

Here's why I do this sort of thing.
  1. I consumed less, by extending the life of a product.
  2. I recycled, by using parts from another used product.
  3. I saved money, by avoiding buying a brand new product.
  4. I customized, getting exactly what I wanted, instead of what someone wanted to sell me.
  5. I gained experience, so next time I'll feel even more confident about repairing something.

Was it worth it? Hell yes, I'd do it again. 


Saturday, April 28, 2012

Build a Shadow Avoiding Robot


You can build a simple robot that responds to a stimulus (the lack of light) by stopping one wheel and reversing the other. This simple maneuver may help the robot leave the shadow it entered and find the light. Once it does, it will drive forward again. Sometimes, the poor little robot will get caught in the shadows and will spin in circles until you rescue it.

This robot is an excellent project for beginner robot builders of any age. I used this design successfully to teach a class full of kids aged 6 to 12. If an instructor or other adult pre-solders the wires to the two motors, it can be built by the student entirely without soldering.


By making this simple robot, children and students of all ages will learn several basic concepts used in robotics. These concepts include differential steering and motor control, sensors, and automated behaviors. In addition, students will gain experience with hands on construction and prototyping a circuit on a solderless breadboard.

You can find complete instructions, materials and parts on Instructables.com at:
http://www.instructables.com/id/Introduction-SpurtBot-ShadowRunner/

Friday, April 27, 2012


Solder Fume Extractor From Old Hair Dryer


I have made a couple of solder fume extractors using Altoids tins. You can find instructions for these on the Internet. However, I always found that I had to get the extractor very close to the soldering, and this was not always easy to do.

The other day I was clearing out my workbench, and I found an old hair dryer saved from another project. It struck me that with this, I could make something that was much easier to position close to the source of the solder fumes.

It turned out to be very simple. I think the video explains it well. Here are the parts, materials and tools I used.
Easy.

Wednesday, March 21, 2012

Why I Love LetsMakeRobots


My Robotics Journey

Most of what I've learned about robotics, I've learned through the support of an online community called Let's Make Robots. While there is an abundance of information on the Internet and in books, LMR is where you can get the encouragement, advice, and inspiration that will get you someplace.

Whether you are an experienced robot builder, a tech-saavy artist, a teacher, a retiree or a student, you will not find a better place to move you further and faster.

Never built a robot before? The now famous start here robot project has gotten hundreds of people from dreaming to actually building and programming a complete robot. It's how I started, and I still use many of the basic techniques learned on that project today.

Though I wanted to build a robot since I was a kid, it wasn't until I found this place that I managed to do it. Now, I blog on robotics and have taught kids at a local museum, a learning center, and at Maker Faire. I've got a lot more stuff cooking, and I owe it all to the other members of LMR.


What You'll Find at LMR

LMR is a free and volunteer based initiative, originally started by Frits Lyneborg in 2008. LMR is 100% produced and maintained by members of the community.

The site is packed with projects, tips, blogs and forums contributed by members. Anyone can contribute, and everyone is encouraged to do so.


Unlike some other sites, where content is controlled by a central group or individual, LMR is uniquely democratic.

It is worth saying that I'm constantly impressed by the quality of young builders that come to LMR. They come in with energy and a dream. They quickly learn how to guide that excitement into the necessary steps to make something cool.


How You Can Get Involved

Well, join the site, obviously! Add your voice, your imagination, your expertize, or just your questions to this thriving community of thousands of users. We have over 10,000 registered members and thousands of visitors every day. There have been over 3.3 million individuals who have visited over the site's lifetime.

Join us!

(Pictured: LMR members map)

There's something else you can do too.


Help LMR Get Even Better

Just to be clear, this is a shameless plug for money.

Whether you are an LMR member, or just want to support a geeky friend or loved one, we could use your help. We are raising money for the development of an updated LMR website. The site is non-commercial, free to users, and supported by generous donations by a few.

But there are big plans for LMR, and it's going to take some help to get there.

Version 4 of the website have been in the works for quite some time. Our developer Hugo has been working unpaid all this time, but he's a professional programmer and cannot continue dedicate time to LMR forever.

The new version will look as much as possible like the present site. Under the covers, however, it will completely new! Each underlying element that makes up a project (robot brain, ideas, components, etc.) can be used and cross referenced by others. This will kick collaboration up to a whole new level, allowing you to drag other people's elements into your own posts.

So, please come visit the LMR donation page

In addition to the great feeling you'll get from supporting this community, there are Fabulous Prizes to Win

In appreciation of your contributions, all donors:
  • Earn LMR's eternal gratitude, and will be listed as a contributor on the LMRv4 'About' page.
  • Will be invited to participate in the LMRv4 beta test.
  • Will be invited to the LMRv4 Virtual Launch Party!
Plus, donate before May 1. 2012, and be entered into drawing for some fabulous prizes from Seeedstudio:
Thanks for reading!

Friday, February 24, 2012

Tinman and Lemonhead

My son and I built a couple of those little fume extractors so we can stop breathing in so much solder fumes.

Of course, we used some candy tins for the cases. We used  a big Altoids tin for one, and a little novelty one I got from Target for the other one.


Here's William working on the second one. The first, in silver Altoids can, is already being used to keep the air clear.

Right now the front is just opened, but I've ordered a big sheet of filter material, which I will cut to fit each fume extractor.


To the right you can see a close up of the bigger extractor in action.


I used one of these old switches that I've had lying around forever. William is de-soldering the contacts with a solder pump, which he loves to do. The old solder was pretty stubborn, but we got the job done.

I love the little lemons on the sides of the box. Lemon-y, lemon-y, lemon-y!

Actually, now that I look at it, they look a little like Charlie Brown.


 Excellent results. Lemonhead!


Wednesday, February 22, 2012

Rotating LED Thingy

Idea and Design
My son William wanted to build an LED light chaser. So I hunted around for a circuit, and dug around in my spare parts.


I decided to build something based on this circuit.
The only differences are, I used a 4069 hex inverter instead of a 4049, because I have a bunch of them, and I changed out the 100 kohm resistor. I replaced the resistor with a 10 kohm fixed resistor in series with a 50 kohm potentiometer. That gave me a nice slow speed at one end and a very peppy speed at the other end.
BTW, the parts list for this project listed on the web page above specifies 150 ohm current limiting resistor, which is what I used, not the 470 ohm resistors shown in the schematic.  Also not clear on the schematic is that the ends of all those current limiting resistors need to to to ground.

The Gathering
As it happened, I had a circular prototyping board from Radio Shack. I did have to go out and buy a 4017, plus I picked up five pair of different color LEDs, and a bunch of 150 ohm resistors. Radio Shack didn't actually carry a 4017 chip, but they had their own LED chaser kit for sale that used the same chip. So I picked it up and stole the chip. I'll order a replacement and build the kit or give it to someone at some point. 
As I was laying out the circuit on a breadboard, I remembered I had the wooden base of a snow globe that had broken lying around. Then I found a plastic dome that almost fit. I would have to route the hole in the base a bit bigger. A toggle switch for power and a potentiometer and a few other parts and I was ready to go.

The Build
Here's the thingy all breadboarded out. I used a small multi-turn pot for the breadboard. It was replaced with a panel mount pot for the final build.
(click image for close-up of the breadboard)

As I mentioned, I had to route out the edge of the base to fit the dome. That was a bit tricky, but I managed fairly well and didn't even endanger myself. I can't recall what the dome was from. Some broken toy or something. It's fairly thick plastic, though. I'm glad I saved those two pieces, and that they found each other in this project.

The base also needed some other work. I drilled out holes for the power switch on one side and the potentiometer directly across. Some careful measuring and drilling were required. The sides of the base are pretty thick, so I had to countersink the mounting holes using Forstner bits.
Quick tip: When making countersunk holes for a switch or potentiometer or whatever, you need three sized bits. First a very small bit to drill a pilot hole. Next the largest bit to make room for the fastening nut on the outside. That cut doesn't pass all the way in, but stops at an appropriate depth. Lastly, a middle sized bit just slightly larger than the diameter of the mounting shaft is used to drill all the way through. With this method, you always have a small pilot hole to keep everything centered.
I mention this, because I forgot to do that when I drilled the holes for the power switch. So my last cut was a little rough without a proper pilot. Compare the cut for the power switch on the left, with the cut for the potentiometer on the right. You can also see some of my sloppy routing along the top of the left picture. It's not perfect, but it look OK.

Last cut on the base, I countersunk two more holes to hold the mounting screws.

I used brass tubing to make some standoffs, and some 6-32 threaded rod and brass nuts to mount the circuit board.

Despite the crazy nest of wires above and below the board, and the solder blob jungle underneath, the project came off rather well.

Here's the finished product. If you click on it you'll get a higher resolution view. I still need to find a nice knob for this project.  It looks very Victorian to me. I won't say it looks steampunk, because integrated circuits are really, really not steampunk.

Fish-Fillet

I present to you, one fish toy.


And now...

Remove the screws- except for the one that got stuck and wouldn't let go!


Gently pry open the two halves- except that the peg and socket holes at the front got stuck and finally broke!


And we have... fillet of fish!


The tail movement uses a simple gear motor and a cam.


I had to cut and pry through some glue before the motor case could be removed. It was pretty well sealed for water tightness, but that's not needed anymore.


I was hoping for more room inside the fish, so I could integrate the electronics for the Fish Tank. Unfortunately, it's too tight in there. We'll have to keep most of the electronics external.


More updates soon...


Thursday, February 16, 2012

Ideas swim like fish

I think the creative flow that an idea takes as it develops is interesting. Usually I'm not too aware of the process, but today I am looking back on an idea that developed in fits and starts.

Monday

It was about 1:00AM. This is when the idea started. I wouldn't have known it then. It is only clear looking back on it now. I couldn't sleep, so I went downstairs and started cleaning my work area a bit. That led to a surprise, which led to me writing this email to a friend.

Doug,

I was just cleaning up my work area (long overdue) and I came across the
box with your turtle bot all nicely packaged and ready to go. Opps!

I'm really sorry about that. I sort of lost track. At this point, I'm just feeling bad
to have forgotten your little robot and the Propeller Head Geek plaque you
sent for Maker Faire for so long.

I also realized I never wrote up a robot page or a review of the tank kit
you sent me, which I had always intended to do.

I'll send it to you.
Or words to that effect. I packed up Doug's stuff, but then...

Wednesday

I said to myself, I really should write that review of Doug's Little Tank kit. WAIT! I've got his other robot sitting right here, ready to ship back to him. I might as well review that one too.

So I unpacked it (again) and took pictures and such. Then wrote the review in my last post. I also posted the tank robot I made on LetsMakeRobots as a robot page.

The kit was fun to put together, but I wanted somthing to customize it and make it special. A GREAT IDEA!

That's what I needed, a great idea... but I didn't have one. So I turned to Google and searched for 'crystal tank', since the clear acrylic of the tank reminded me of crystal. I tried an image search and came up with this:


How cool! A fish in a clear tank. That would be fun to make.

Thursday

The idea languished in the back of my head for a bit. I tried to come up with a way to integrate a fish tank. Maybe something like this?


That's a very crude mock up with a toy fish bowl on the back of the tank. All done in simple graphic programs. The fish would swim around inside, which might look neat. However, I really wanted some microprocessor control over the fish, not just fish having a piggy-back ride. (Too many animals in that description.)

Here's where a spark happened. I had sort of named the robot Crystal Tank, but I really didn't like it.

Then, later that day...

Of course the name should be "Fish Tank"! Nothing else would do! And if it is a fish tank, it doesn't actually need a bowl. It's a mechanized pun! So I could eliminate the bowl and use a larger fish that could fit some servos inside to make it move around a bit. I searched for some appropriate toy I could use.

I saw a few different ones. Then I saw one of those 'Swimaround' toys, and I knew I had it.


I mean, even the color scheme matches! It's perfect. I can use a servo to turn the whole fish, with the distance sensor mounted inside. And the tail can wag.

Later again...

I was attending one of RobotGrrl's Robot Parties, where she hosts a few geeky friends on a Google Hangout, and we all show off our latest project. Robot dancing often features prominently. As I explained my plans for the Fish Tank, I got another lightning strike from above.

The Fish Tank had to play music, and the fish has to dance to it. It would be a one-fish homage to the Sashimi Tabernacle Choir. If you haven't experience that, you should definitely check it out.


OK. So now the idea is nearly fully formed. I think it is time to go build this thing.

Ideas can be elusive things. Creativity isn't always easy. But some of my best ideas just seem to flow... like fish in the sea. (Sorry, I had to say it.)

Wednesday, February 15, 2012

PropoellerHeadGeek.com Laser Cut Robot Kits

Introduction
Last September, propellerheadgeek (Doug) sent me one of his Electric Turtle robots to bring to MakerFaire. He was also kind enough to include one of his laser cut tank kits for me to check out. After an extended delay, here is a review of these two products, which he has available for sale as kits.
Below you can see both kits assembled, with a marble engraved plaque Doug sent along with his robot. Pretty.


What You Get
Doug's kits come as a set of unassembled laser cut acrylic parts. You provide the specified motors, processor, sensors, etc.
He has four models available at the time of this writing. Three variations of the "turlebot" and one tank kit.
The two models I examined seemed to be very well designed and manufactured. The quality of the materials was very good, with 5mm thick acrylic, parts that align perfectly, and quality etching.
Doug sent his turtlebot already assembled, but I had the pleasure of building the tank kit myself. Assembly for each kit is documented in an Instructable.

Electric Turtle
The Electric Turtle is a two deck round chassis set up for differentially steered wheels. The three kit variations are for the Solarbotics GM-9 motors, continuous rotation servos, or the Tamiya dual motor gearbox. The model pictured here is the Tamiya version.


I liked the quality etching on the parts. In addition to Propellerheadgeek.com branding the top deck of the Electric Turtle is marked with angles from zero to 90 degrees to aid with aligning the sensor on the head servo.


Here's a shot from underneath, showing the Tamiya gearbox, mounting holes, etc. Note the omni caster at the bottom, and the cut-outs for the head servo.

I think the robot Doug sent me was his own, and had probably been around for a while, based on the cracked rubber of the wheels. That is no fault of the chassis, though. All-in-all, it is a very nice kit.

Little Tank
I like the Little Tank robot a lot. I feel like I want to take advantage of the clear body and add something a bit flashy, like some bright blue LEDs. Maybe later.
With the Tamiya gearbox assembed for a high torque gear ratio, this tank can crawl up a 45 degree angle with little problem. I have the robot powered with 3xAA 1.6V NiZn batteries, which are unusual. Fully charged, they are more like 1.8V, and three of them give the Little Tank plenty of power.


This side view gives you an idea of the overall layout. The circuit board on the back is a power regulator board I made. One comment I have on the kit is that if you want to add your own additional board to the kit, you will need to add a deck, place it between decks, or extend it off the existing deck like I did.


Below you can see there is enough width between decks for a 3xAA battery holder with some room to spare. I couldn't get a 4xAA battery holder to fit.


Addendum: I noticed that if you use a standard sized servo instead of the micro servo and adapter, there is actually not enough room for a 3xAA battery holder. However, you can raise the standard servo about 12-13mm with some stand-offs, and then you can still fit the battery pack. See below.


From above, you can see the placement of the deck for the processor (a Picaxe 28 project board, in this case). You can't tell from the picture, but Doug nicely included etched lables on the deck to indicate the mounting holes for Picaxe or Arduino. That's a friendly touch.


OK, last picture. In this one you can see the nice sensor mounting bracket, which will work for a Sharp IR or many of the common sonar sensors. The head servo can be a standard or micro sized, as there is a micro servo adapter included. The hole behind the servo mount is useful for routing wires. I also used it to place a nice sized power switch.


Kit Assembly
I didn't assemble the Electric Turtle myself, so I can't comment much on it. However, Doug provides this nice set of assembly instructions for the Electric Turtle Robot on Instructables.
I did put together the Little Tank kit, following the assembly instructions for the 'Little Tank' Robot Arduino/Picaxe/Tamiya Platform on Instructables.
The instructions were pretty good, though I ran into a bit of trouble on Step 7. You have to assemble the parts in the right order, or you'll wind up taking them apart and trying again. I commented on the Instructable with a suggested order of assembly.
Overall, I give the kit assembly a thumbs up!

Results
Nice quality, good design, easy assembly, good price!

Where to Get One
Get 'em at PropellerHeadGeek.com. I didn't order one through the website, since Doug sent me the stuff directly. However, the site accepts PayPal and he has reasonable shipping terms. The prices for the kits are $18 for the Electic Turtle varients, and $21 for Little Tank, which I think is very good.
I also saw customers write in with positive reviews for the quality of his products and for his service.